Basic Snort Installation using OpenBSD
- Keegan Brunk-Fraedrick
- May 28, 2022
- 4 min read

Updated: Jun 28, 2022
This write-up documents the steps needed to perform a basic installation and configuration of Snort using OpenBSD 7.1. Because of the scope of this application, only the relevant plugins with the most basic configurations will be addressed for brevity. It should also be pointed out that using different preprocessors and exploring the 200+ default plugins that come with Snort is strongly encouraged, as there are a wide array of options to monitor, detect, and manage network traffic. For more information on commands, processes, and, further documentation please refer to www.openbsd.org and www.snort.org.
*Note: the minimum operating requirements for this application are minimal, however a Pentium-class or better CPU with between 512MB and 2046MB of RAM and a full-duplex 1000MB/s ethernet connection seems to be preferred for configuring Snort in a SOHO environment.
Overview
Update OpenBS and install Snort
Download the rulesets and make a test rule
Configure Snort
Validating Snort alerts and log generation
Testing deployment
Step 1: Updating OpenBSD and installing Snort
Update the latest patches and firmware from OpenBSD and then download Snort.
Step 2: Download the rulesets and make a test rule
Register a free account at snort.org to be given a oinkcode, which you can then use to
download the community rulesets.
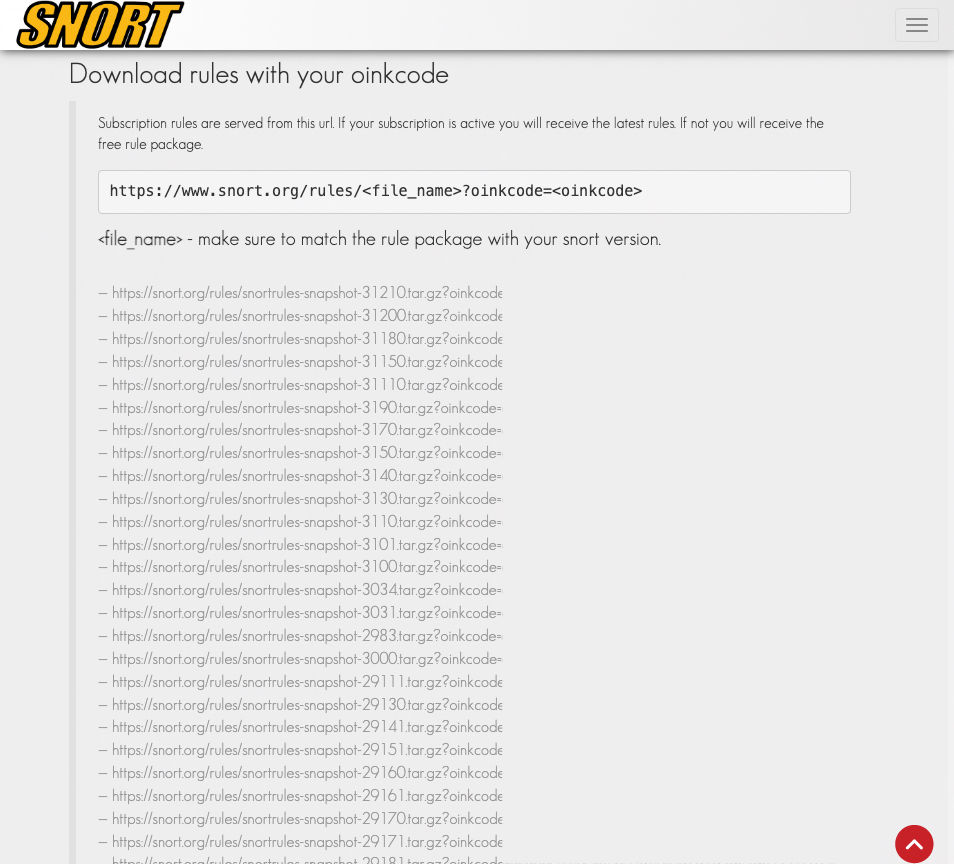
Start by going to the snort directory #cd /etc/snort
Download and unpack the rulesets #wget https://snort.org/rules/snortrules-snapshot-29111.tar.gz?oinkcode=<oinkcode> #tar -xzf snortrules-snapshot-29111.tar.gz?oinkcode=<oinkcode> This will populate /etc/snort/rules/ with rules from your downloaded ruleset.
Copy the rule below into the test.rules file to make the test rule:
alert ip any any -> any any (msg: "Testing Alerts"; sid:1000001)

This rule will now trigger an alert every-time any IP address is seen by snort going anywhere.
Step 3: Configure Snort
Identify which interface will be used and the IP address of the home network subnet #ifconfig
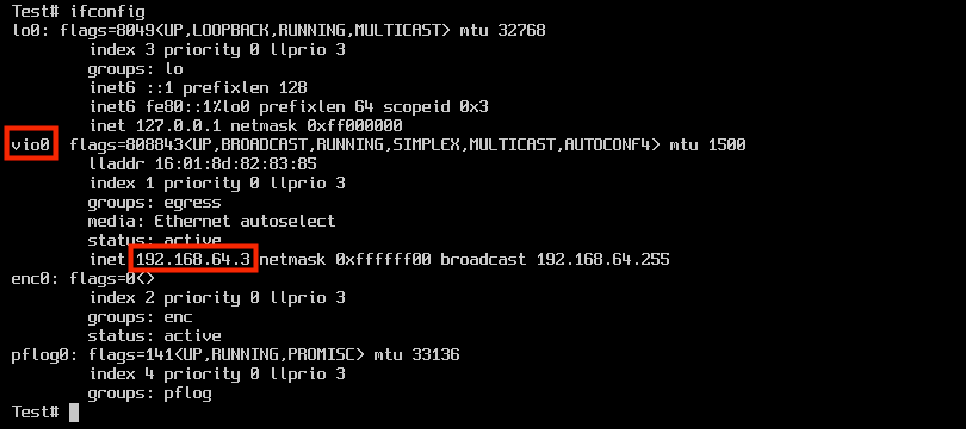
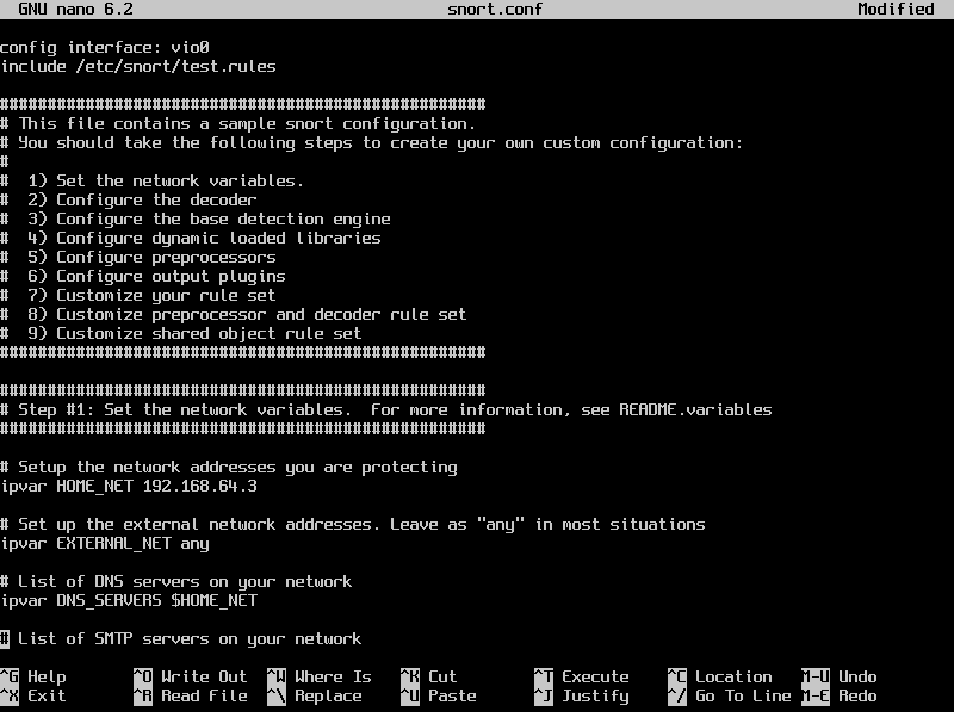
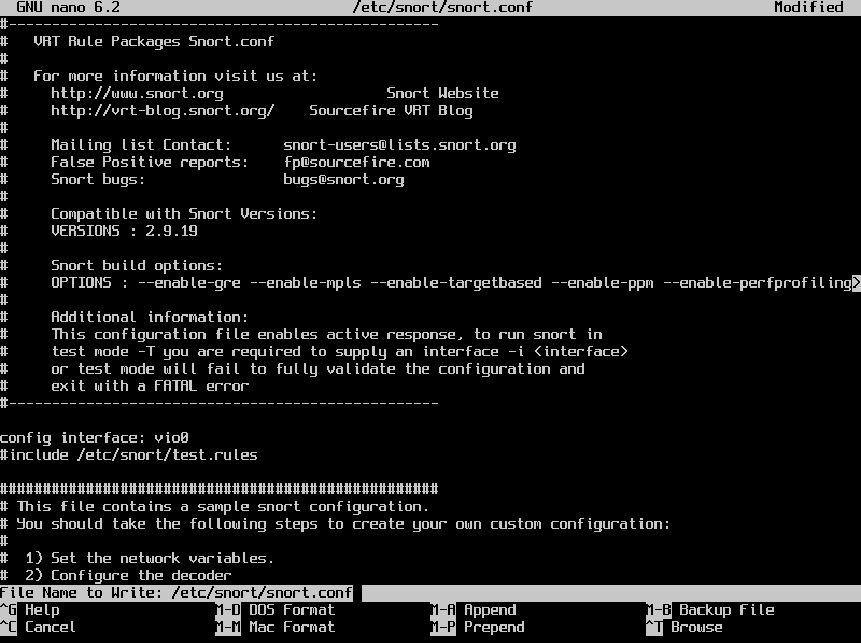
Edit the /etc/snort/snort.conf file to configure which interface is used, set the home network IP range, and include the test.rule to generate the test alert. Add the lines below to the snort.conf file: config interface: vio0 include /etc/snort/test.rule ipvar HOME_NET <the IP range for you homenet>
Test the /etc/snort/snort.conf file for syntax and configuration validation before
testing alert and log generation.
#Snort -c /etc/snort/snort.conf -T
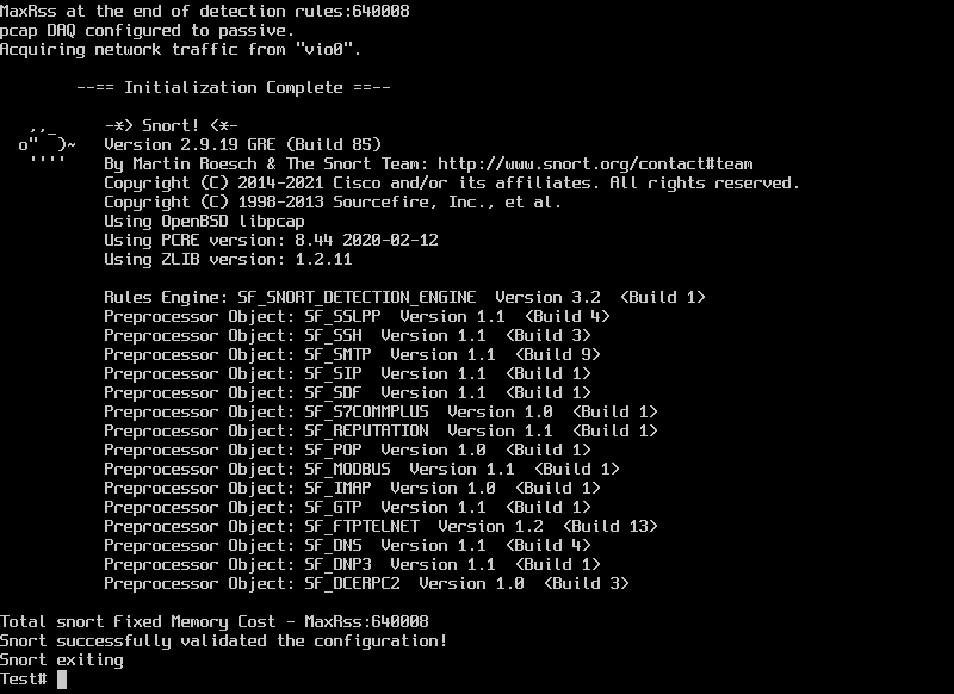
The resulting output will either successfully validate the snort.conf file or identify any configuration/syntax errors upon exiting.
Step 4: Validating Snort alert and log generation
Trigger the test alert by pinging the system that snort is installed on from another system on the same network. #ping 192.168.64.3
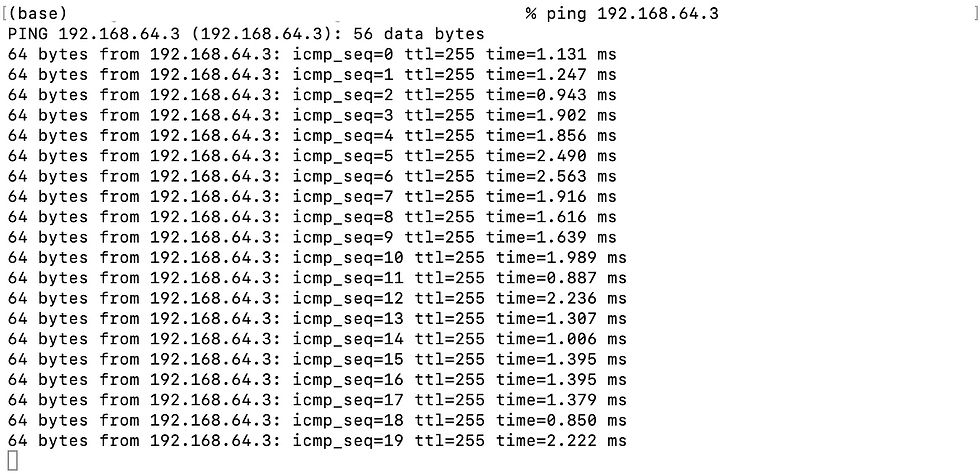
While the system Snort is installed on is being pinged, run snort in console mode to verify the generation and logging of rule based alerts.
First, make the log directory that snort will use.
#cd /var/log/
#mkdir snort
*Note: If the default log directories are desired then skip this step and edit the script in /etc/rc.d/snort accordingly.
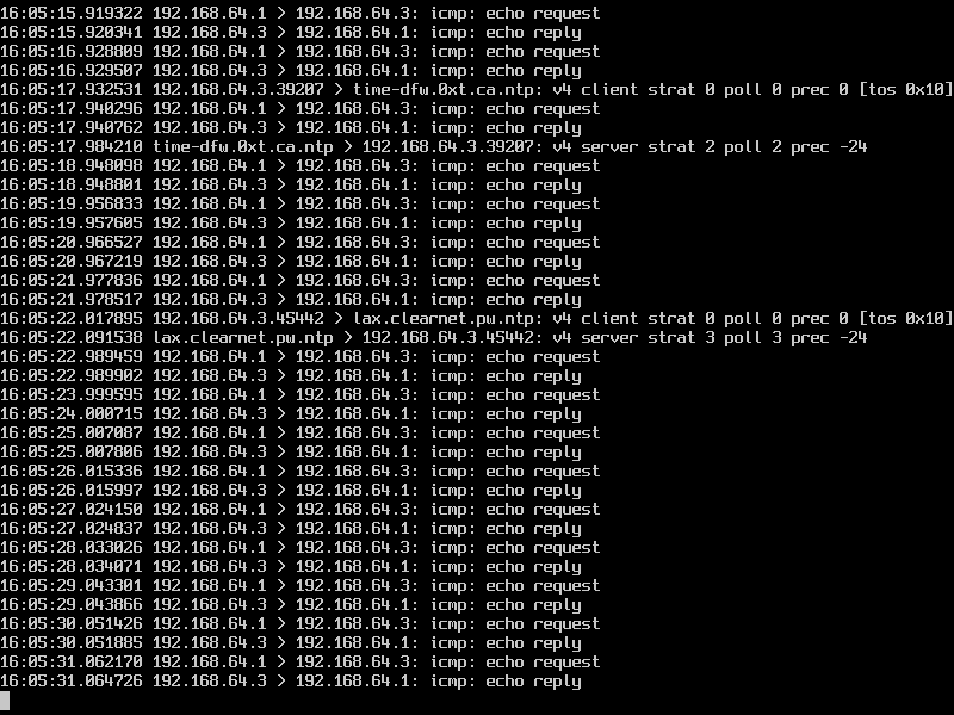
Then, run Snort by specifying the snort /snort.conf file with the -c flag and
then sending alerts to the console with the -A flag. Logging files that can be read by tcpdump is controlled by the -l logging flag followed by -b which specifies the binary output that tcpdump uses.
#snort -c /etc/snort/snort.conf -A console -l /var/log/snort/ -b

Verify alert based logging, then exit snort by using the combination control+x.
This confirms that Snort is running and generating log based alerts. Delete the logs for future testing. #rm snort.log.*
Step 5: Testing deployment
After generation of log based alerts is confirmed, edit settings to allow for continued deployment of snort.
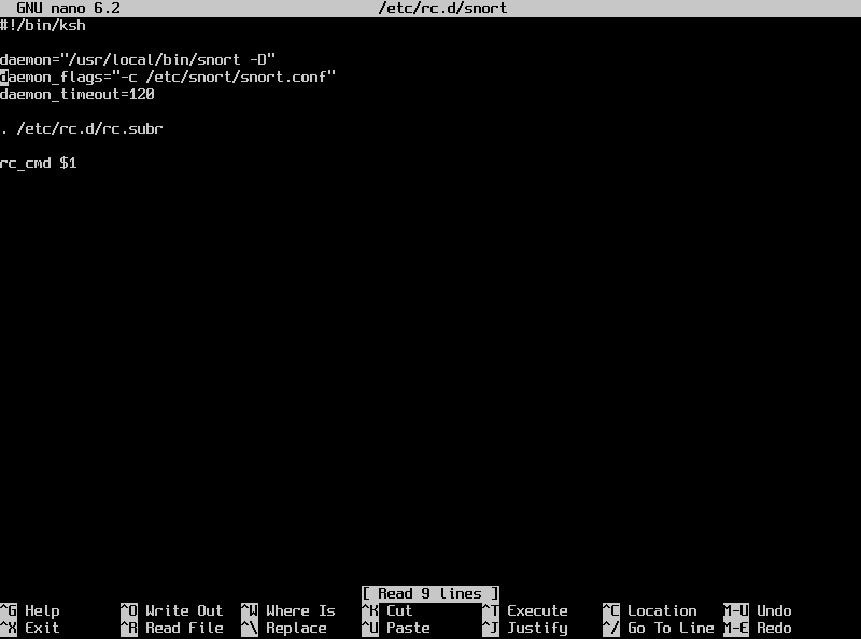
Edit the daemon control scripts to remove commands already specified in the configuration file. #nano /etc/rc.d/snort Edit the script to match the file below:
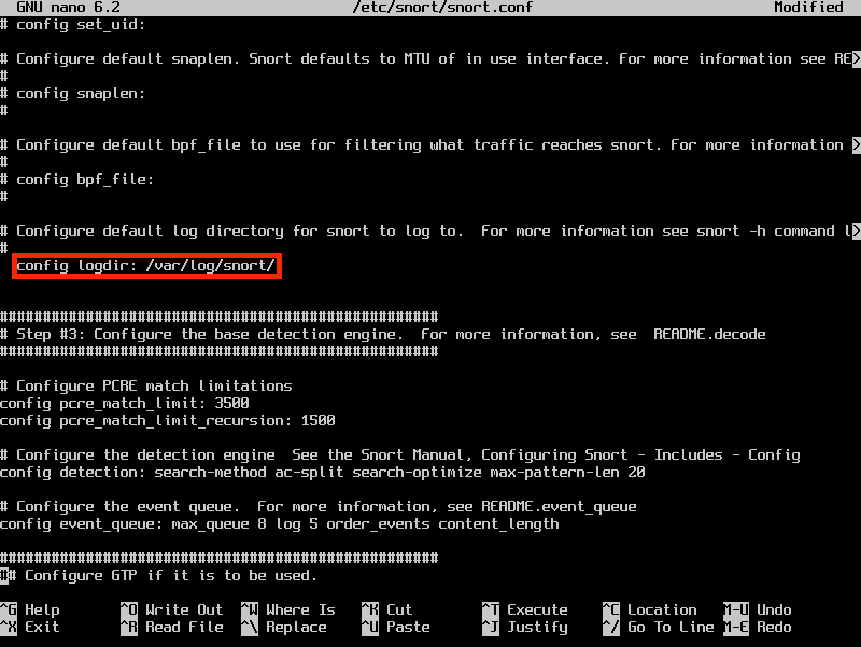
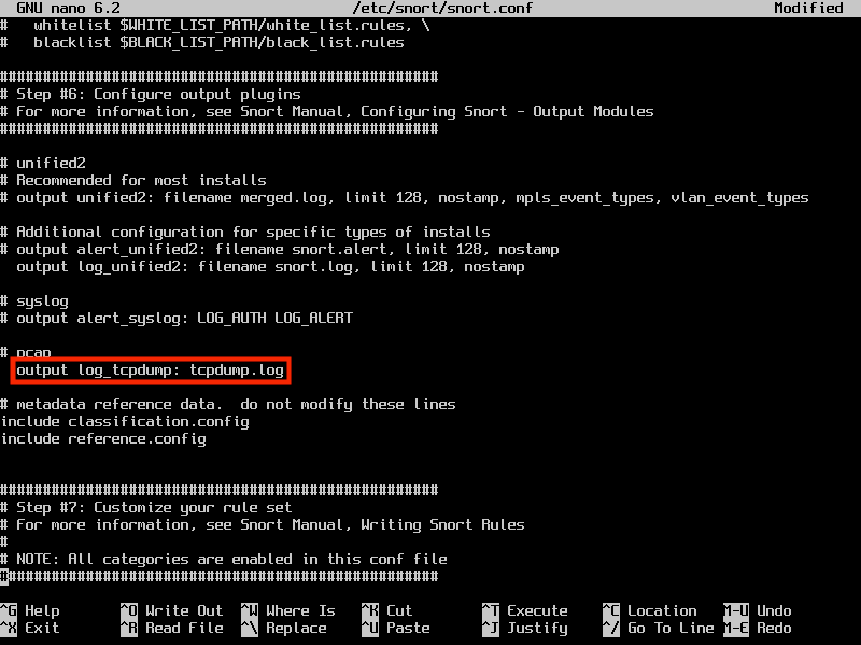
Configure the /etc/snort.conf file to direct Snort to log alerts in a tcpdump readable format in preparation for deployment as a daemon.
#nano /etc/snort/snort.conf
Uncomment the lines below to allow Snort to log alerts in the tcpdump format and generate local syslog alerts in the specified directory:
config logir: /var/log/snort/
output log tcp_dump: tcpdump.log
Test the new snort.conf file for errors before deploying Snort. #snort -c /etc/snort/snort.conf -T
Once the configuration file is validated start Snort by using the rcctl command. #rcctl start snort Test the deployment by triggering the same test alert again. Ping the Snort
system and then view the created logs. Navigate to the /var/log/snort/ directory to confirm the logging of alerts. #cd /var/log/snort #ls

Once logging is confirmed, stop Snort and remove the test rule from the
configuration file. #rcctl stop snort Remove or comment out the line “include /etc/snort/snort.rules” from the
configuration file, before enabling and then starting Snort again.
#nano /etc/snort/snort.conf
#rcctl enable snort && rcctl start snort #rcctl check snort This enables snort to be started by the rcctl utility after each boot and then starts the Snort daemon as an intrusion detection system (IDS). Snort is now deployed on your network!
Comments